Part of maintaining an air conditioner is cleaning it. This article is a guide on how to clean a Carrier air conditioner.
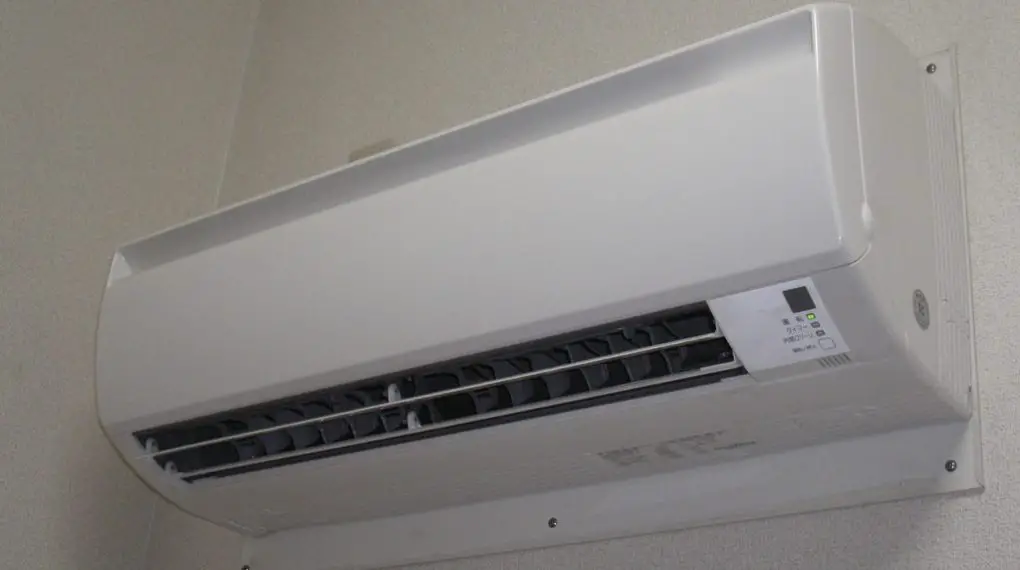
Table of Contents
How to Clean Carrier Air Conditioner Coils
A Carrier air conditioner has two sets of coils: the indoor or evaporator coil and the outdoor or condenser coil. To clean the evaporator coil, you will need to remove dirt and debris that may be clinging to it. Use a brush specifically made for that purpose because the coil is fragile and may get damaged under any pressure. After that, apply a self-rinsing coil cleaning product. It will remove the remaining dirt and the coil will rinse when the air conditioner is running.
Cleaning the outdoor condenser coil fins is more detailed. The reason is that it attracts and holds more dirt than the evaporator coil. You may need professional help to clean it if unsure of the process. However, if you can do it yourself, you need to open the condenser to have better access to the fins. Whatever you do, ensure you are careful around the fins to avoid damaging them.
Compressed air is an effective way to remove dirt from the condenser coil. But the trick is to blow the air in the opposite direction of airflow during regular operation. Doing this pushes the air from the clean side out through the dirty side to prevent soiling clean parts. Also, the air should blow straight out and not at an angle. Blowing at an angle can damage the fragile fins.
A shop vac also works, but it can only remove loose dirt on the surface. For more detailed cleaning of stubborn stains, it may require using a special cleaning agent or any mild household cleaning agent. Mix the cleaning agent with water and apply it to the coil using a sprayer with low pressure. If you use a commercial cleaning agent, rinse the coil with a garden hose using light pressure.
Carrier Air Conditioner Self-Clean Feature – How to Use
There is a dedicated button on the air conditioner remote control that allows you to turn on the feature. You may not find it on all models of Carrier air conditioners, but for models with the feature, press the button once to activate it. The air conditioner runs on its own without further help from you, and the fan will run at low speed all through the cleaning process. Then, the unit automatically turns off after about thirty minutes of cleaning.
If your model does not automatically stop the self-clean function, there should be a start/stop button to start or stop it at any time. And if you want to cancel the function, you may have to consult the user manual or contact the Carrier Service Center for further instructions.
The feature works for different modes of operation – cool, dry, auto – and dries the interior parts of the indoor unit to keep it clean. However, it does not remove mold that already exists in the indoor unit and does not clean the room. You will have to do it manually. If you want to stop the function during operation, press the start/stop button twice in quick succession.
How Do You Clean a Carrier Air Conditioner Filter?
Cleaning the air filter in a Carrier air conditioner is simple. Note that you can always use professional services if you are unsure of the steps. But you can follow the instructions in the user manual to open the indoor unit and remove the filter. You must also know if the filter is reusable or disposable. This article on how to clean a Carrier air conditioner filter explains the steps for easily maintaining the filter and air conditioner.
Check out these other articles…
Carrier Air Conditioner Not Working [Proven Solutions]
Carrier Air Conditioner Turning On [Issues, Solutions & Guide]
Carrier Air Conditioner Leaking [Quick Fix]
Carrier Air Conditioner Lock [Issues & Solutions]
How to Reset a Carrier Air Conditioner [Detailed Guide]
How to Clean a Carrier Air Conditioner
Start by disconnecting electric power from the air conditioner. If you have an outside unit, clear the area around it; remove grass, shrubs, and other forms of obstruction. If you recently cleaned the condensing unit, there is no need to clean it again. All you have to do is remove dead leaves and other debris around it and on it. However, if you have not cleaned the outside unit, follow the instructions in this article to do the job.
Another vital part to clean is the condenser fan. It is usually connected to the condenser, so removing it may be difficult. Lift it as far as it can go and clear dust and debris from it. If it is extremely dirty, use soapy water and a cleaning cloth to wipe the blades and other parts. Do it carefully to avoid getting water on the motor and other connections. Ensure it dries before putting it back in place.
Next, turn off the power at the main breaker if you want to clean the indoor unit. Clear cobwebs, dirt, and other forms of dirt around the unit. Cleaning the air conditioner gives you the opportunity to check for damage in the ducts, cables, pipes, and other connections. If you find any, get professional help to fix the issues.
After that, remove the air filter and clean it. Note that it is not every air conditioner filter that is washable; some are disposable. If yours cannot be washed, replace it. But if it is reusable, clean it following the directions in the user manual or in this guide. Also, clean the evaporator coil if you have not already done that. Follow the instructions in this guide to do the cleaning job.
The blower is also essential in the unit and should be cleaned. You can use a vacuum to remove dirt and debris from the blower and wheel while it is still connected to the unit. If you can, however, remove the blower assembly and thoroughly clean it. Dry every part before replacing the blower in the indoor unit.
Furthermore, clean the cover panel for the indoor unit and do the same for the exterior cabinet. Afterward, replace the cover and turn on the breaker to power the air conditioning system. Before completing the task, check other filters around the house if you have any. Clean the furnace and exhaust fan filters or replace them if overused. Use professional help if cleaning the entire unit is tedious.
Note: This guide on cleaning a Carrier air conditioner applies to all Carrier air conditioner types. If the steps to clean your specific model seem complicated, contact Carrier to request service and a service technician.
How to Clean a Carrier Portable Air Conditioner
To clean your portable Carrier air conditioner, disconnect it from electric power and set it in a solid place. Ensure it does not wobble and is not in danger of falling. It works best if you leave it on the ground.
Gather what you will need to clean the unit – a washcloth, a cleaning container, a screwdriver, and a cleaning agent. Mild dishwashing soap is best to avoid chemical damage on parts of the unit. Next, drain the water from the water tank behind the unit. Typically, the water should evaporate because there should not be a lot of water in it.
However, if humidity is high, a high amount of condensate tends to collect in the tank. Consequently, you have to drain it manually. Otherwise, the portable air conditioner may malfunction. If you have a floor drain, set the unit close to it and open the drain cap. The water will easily drain before you begin cleaning the unit.
But if there is no floor drain, put a container under the drain port and open it. Another method is to connect a hose to the drain port and channel outside the house. You may leave the hose connected to the drain afterward so you do not need to drain it yourself. But ensure the water does not damage any part of the house, inside or outside.
Next, open the panel and clean the filters. Most portable air conditioners have more than one air filter, so locate ad remove them. If they are disposable, get replacement filters. But if they are washable, wash them with soap and water. Leave them out to air-dry completely before putting them back into the unit. Do not forget to clean the fan in the unit at this point.
While they are drying, clean the coils. Use a soft-bristled brush and clean them; the coils on a portable air conditioner are not extensive and are accessible. So, they are easy to clean. If the dirt on them is not significant, the brush should do the job. However, if there is a significant amount of dirt, clean with a brush and a damp cleaning cloth. You also have the option of cleaning with a special coil cleaning agent of your choice.
After that, clean the exterior and other parts of the portable air conditioner. It works best if you do so while the panel is open. Reach parts that may have dust and dirt collected on them and clean with a damp cloth. In addition, clean the cabinet to remove stains and finger marks. Wipe the parts again with a clean cloth to remove any residue and dry them.
Afterward, replace the air filters and close the panel. Close the drain if you do not connect a hose to it for easy water removal. Then, move the unit back to its original position and reconnect it to electric power.
Note: Ensure there is proper air circulation around the unit so that the coils do not overheat. Leave a few inches of clearance around it and try occasionally cleaning the area to keep dirt from restricting airflow.
Recap
Learn how to clean a Carrier air conditioner from this guide because it is an integral part of maintaining the system. You will find instructions on how to clean the air conditioner air filter, condenser coil, evaporator coil, and other parts of the system.
Typically, it is recommended that a professional contractor does the cleaning job because of delicate parts. However, it is not always convenient to hire a professional. So, use this guide if you have the skillset. Otherwise, contact Carrier to request service or employ the services of a professional HVAC technician.